I know, I know, I am crazy for making a cake like this, but my kids really wanted
a 3-D McQueen Cake for their B-day Party and since they had the party together, it was either $150 at a bakery or about $30-$40 in baking good plus my time of course.
So here it goes:
Oh and there was a request for a specific cake.
The request was chocolate cake with cherries.
So here is the first cake that I made
(then I realized I need two to make the cake look like the car)
Its a recipe for a Devils Food Cake
I used a 9x11 pan
the the 3rd smaller cake I made was on a 11x17 pan this was made for the road of the car
Since the Devils Food Cake is a bit on a fluffier side
I stuck it in the freezer for a few hours so it can be easier to cut into the shapes of the car.
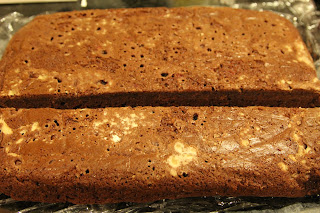
Here are the cakes, one chocolate cherry and the other chocolate with chocolate chips
Cut 1/3 of the cakes longer side on both cakes
Make your Butter Cream Icing Mix
spread the icing and place the two bigger pieces one on top of the other
the icing acts as a glue and makes things stick
then use the one of the 1/3 parts of the cake that you cut before,
(the other piece you will use for wheels)
cut it in half and place on top top of the cake like so:
Here is the part where you have to shape the car,
cut the back end on an angle, this will give you two triangular looking shapes
and place them in the back as the spoiler
then trim the front of the top again on an angle
to make the lights and place them on the hood of the car
this is how it should look before you cover it with icing
(I got the shape cutting directions from a YouTube Video)
as you see, cover the whole car with icing so the Fondant will stick to the cake
Next are the wheels, I used yogurt cups to cut out the circles for wheels
then you have to take out some cake for the wheels, so make some nice holes
now its time for your fondant, as you see I already purchased mine in red
roll it out nicely so it can cover the whole cake
then gently place in on top of the car and shape it with your hands so all the shapes show up
Next, again using that same yogurt cup, cut out the circles for the wheels
and cover them in fondant.
This is the shaped car with the access fondant cut of
and placed on the road that looked like cracked ground
and the wheels that go in
this time I used black colored icing to decorate the wheels
and some white for the inside
For the decorations on the car I used Candy Decorating Pens
this seemed like a better option
then buying all the different color fondants to make all the designs.
The Candy pens were sold in one pack with
blue, red, yellow and white so that worked out better.
Not only did they have thin ends
it was easier to write and make small designs like the eyes or lights
and here is the finished product.
The kids loved it and it tasted really good, I was truly amazed that I made it.
Oh and one more thing make sure you keep it in a cool dry place,
cake like this does not need to be and should not be refrigerated,
that's why all the ingredients were not made with any milk.
Enjoy!!!


No comments:
Post a Comment